Category: English Post (Page 59 of 97)

Restoring Linux boot (Dual Boot Saga)

After I installed Windows. I have lost Linux in the boot menu, in fact there wasn’t a boot menu at all!
As soon I boot the computer Windows would come up and take the boot from there?!

I wanted to have Windows, not for Windows to be all I have!!
I had to restore booting to Linux, not only I liked it so much, my data and programs were there (Windows can’t “see” the Linux partition).
At first I tried installing BCD Boot to create a boot menu, it failed on a daily biases for me!
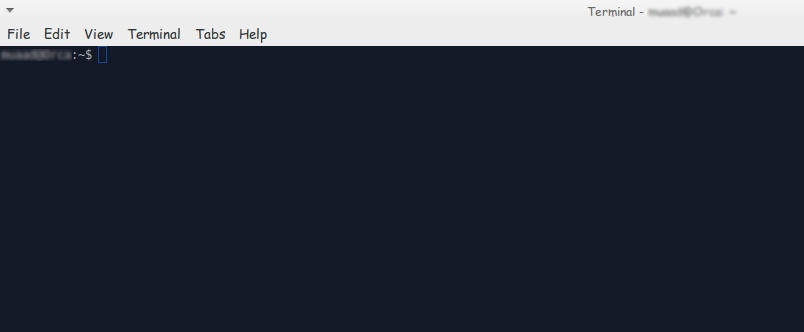
I had to try a better solution, and what better solution that the Linux terminal? <3
I booted to Linux from a live disk (you can create one by following the steps in here).
After it boots go into the terminal and enter the following command:


sudo fdisk -l

This command will show you all the partitions on your HDD, you have to know which partition your Linux distro is installed on (Gparted can be a great help in that).

Use gparted to see where is Linux installed

and enter this command:


sudo mount /dev/sda1 /mnt

then this command:


sudo mount --bind /dev /mnt/dev

then this command


sudo chroot /mnt

then this command


 grub-install /dev/sda 


then this command

update-grub 

If the computer boots directly into Ubuntu (or whatever Linux distro you have)
go to the terminal and enter:


sudo update-grub

Finally reboot and you will have the grub menu with Both Linux and Windows!

If you have an issue mounting you should use this command

Sudo touch /cow

The purpose of these commands is to install Grub (The boot manager) so you can dual boot easily from the menu.
If you want to customize grub for example the names of the systems and the list order you need to download Grub Customizer. I think I’ll post about it sometime later 🙂

Setting the first line as the file name in LibreOffice

LibreOffice Logo

One of the few features I missed moving from Microsoft Office was the auto name upon save, where Word takes the first line of the text and uses it to name the text file. LibreOffice (and OpenOffice before that) don’t have this feature! It’s a small thing but over time it becomes a growing nuisance!

Luckily there is an easy fix for that! Which enables you to enjoy the luxury of easy naming of files and limit the Untitled flood over time!

We are going to use a feature known as macros. macros in office are a Visual Basic code that is used to preform a certain task over and over and is triggered by an event. In this post I’ll be showing how to create a macro that saves the file using the first line of text when pressing the key combination of CTRL + S (assigning the macro to save or save as will result in two files: untitled and the first line of text!) So at first, we are going to need our macro. I took this code as is from an OpenOffice form, it works fine without editing:


  Sub FirstLineFileName_Writer
    On Error goto EH
    oDoc = ThisComponent
    oVC = oDoc.CurrentController.getViewCursor
    Mark = oDoc.Text.CreateTextCursorByRange(oVC)'mark position of view cursor.
    oTC = oDoc.Text.CreateTextCursor 'created at the beginning of doc.
    While oTC.isEndOfParagraph 'skip empty paragraphs.
    oTC.gotoNextParagraph(false)
    Wend
    oVC.gotoRange(oTC,false) 'a text cursor can't go to the end of a line
    oVC.gotoEndOfLine(true)  'so we have to use the view cursor.
    filename = oVC.String
    url = ConvertToURL("C:\" & filename & ".odt")'Insert Your Desired Directory Path.
    oDoc.StoreAsURL(url,Array())
    oVC.gotoRange(Mark,false) 'return view cursor to original position.
    oDoc.Modified = false 'avoid Save being called if doc closed without further edits.
    End 'end normal execution.
    EH: 'error handler.
    MsgBox "You may have illegal file name characters in the first line." & Chr(13)_
    & Chr(13) & filename,,"AN ERROR OCCURRED"
    End Sub


This code is used to save the text file by taking the first line of text and setting it as the name. You can edit the directory of the save. Please note that it saves without conformation!


Tools > Macros > Organize > Macros >LibreOffice >Basic

Opening the macro menu

New to add a new macro.


Adding a new macro


Run Macro then choose the macro manually from the menu. But that’s not too handy, is it?

Customizing the key combination

Go to LibreOffice writer and navigate to the menu: Tools > Customize > Tab: Keyboard.

Delete whatever is on CTRL + S, and assign it to the new macro by looking for it, and if everything went according to plan. It should save the 1st line as a file name.

Checkout this for more information.

Important notice

If you get errors it’s because the directory isn’t correct. Libreoffice will default to C:\ and when it can’t save in it. It will crash the macro. I edited the code to: “D:\Documents\ but make sure to choose your own folder.

LibreOffice 5.0 is out!

Finally after what seemed like forever! LibreOffice 5.0 is out!
“LibreOffice 5.0 is the tenth major release since the launch of the project and and the first of the third development cycle. LibreOffice is a full feature open source office suite which compares head to head with every product in the same category, while it stands out for superior interoperability features.”


I’ve downloaded it for both Windows and Linux. And I immediately noticed the different GUI elements implemented into LibreOffice 5 in comparison with 4.x which are differently cleaner and takes less screen space!


Thanks to improved filters the compatibility between LibreOffice and other office suits like Microsoft Office has improved. And a lot of under the hood work has been done to improve the stability and reduce the crashes overall.
Version 5 with be the foundation of the Android version, Ubuntu touch, and the upcoming cloud version.

Note: if you are downloading the 64x version for Windows you are going to need a 64x Java machine.

It looks really good and I can’t wait to sink my teeth into it and make full use of it’s amazing features!

Windows 8 Installation and Activation (Dual Boot Saga)

I freshly installed Windows 8 Pro on an old friend’s laptop that soon collapsed. So I had to do something so I don’t lose the Pro license!
That laptop has been acting off for quite some time.

It was time to replace the 4+  year old laptop with a new one. (The old one came with Windows 7 so I got it a new HDD and installed Windows 7 on it.)  But what will happen with the original Windows 8 pro that was installed on it? I decided not to let that code go to waste! I had Linux running on my computer and I decided to dual boot (I don’t like having two laptops).

The step process was pretty straight forward and there was nothing to write home about.

Creating the partition table

I used Gparted to create a new partition on my computer (after I backed up all the data of course!).
This is the drive after I used Gparted to create a Partition to install Windows
You must use Gparted with care. This link doesn’t show the exact steps but it’s very close!
I used this tutorial to put a Windows 8 Pro ISO on a USB drive.  It’s faster to install from a USB. So I went for it.

Then I entered my install media USB chose the newly created partition and installed Windows, This is a link from Microsoft showing how to “clean install” Windows.

Now we come to the Activation part

Upon activation I couldn’t activate the key I had! It won’t activate!
It took the key but didn’t activate..

A quick Googlesearch and I was good to go!

Check the link for the steps.

I was glad at this point. I installed Windows and activated it. but at this point I had two major problems!

These major problems were:

  1. Installing Windows 8 ruined the boot settings! I can’t see Linux anymore!
  2. I needed to transfer the Windows from the old laptop to mine.

There were some minor things I solved right away!

  • There was a minor nuisance of Incorrect Clock Settings in Windows when dual booting. I fixed easily following this tutorial
  • I wanted to Enable .Net Framework 3.5 without downloading it. it was an easy fix and you can check it out from here.
  • Windows 8 has the Fast boot feature that makes the disk unaccessible from Linux if Windows 8 was shutdown unexpectedly. This is why you need to disable it. And this is how!

I’ll be getting to those major problems in the second and third part of our saga! Stay tuned!!

Make sure to leave your comments and suggestions in the comments section below.

« Older posts Newer posts »