![]() Today we are looking into backing up on Ubuntu, I’m going to show you the best way to make full use of the integrated backup utility. And optimize it to be easier and much more productive!
Today we are looking into backing up on Ubuntu, I’m going to show you the best way to make full use of the integrated backup utility. And optimize it to be easier and much more productive!
Ubuntu has the backup utility right out of the box. Which is great for new and experienced users! You can customize it with very easy steps to ensure maximum files protection at regular intervals.
I’m going to break it down into easy to follow steps:
First of all, we need to open Settings
2. From there click Backup
Here we have the Backup utility. On the left we have several tabs to edit in order to customize to our liking.
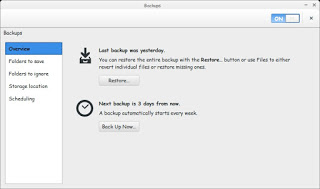
3. Let’s look at the overview, this tab tells us when the last backup was made. And when the next backup is due. And you can backup at any time from here by pressing backup ( it won’t mess the backup schedule you made).
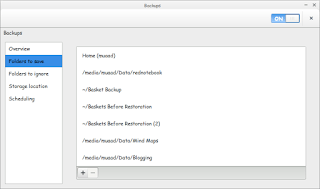
4. Folders to save: Here we get to choose which folders we want to backup. It doesn’t have to be on the same partition!
You can hand pick folders from across the drive to be backed up.
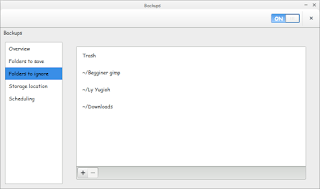
5. Folders to ignore: The exact opposite! If you have some files / folders you don’t want to backup, add them here and the backup utility will ignore them. Let’s say you have a huge video file you captured and you don’t feel like backing up. Well it won’t be backed up if you add it here 😀
6. Storage Location: Choose a drive outside of your computer. Naturally to stay out of harm’s way. And to keep the files in a second location. Backing up in the same PC is a bad idea! Choose a folder for the backups to be stored. And you are good to go!
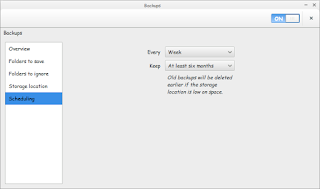
7. Scheduling: You can backup on a daily basis or weekly basis. Choose whatever suits the nature of your work (important files require daily backups)
And the button keep chooses how long you keep a backup. You can choose between three options:
- Six months, that’s the lowest amount of time.
- 1 Year.
- Forever.
And again. That’s up for you to decide how old to keep your files.
After optimizing all the options you can disconnect the backup drive. And the backup utility will tell you when it’s time to backup via a notification (as it starts with the system). Just connect the drive when asked to do so. And sit back and enjoy a nice cup of coffee as the files are being backed up as planned!
That’s it! An air-tight backup plan on Ubuntu in just a few clicks!
How did you like this post? Did you know that the backup utility can be this flexible?
Let me know what you have to say in the comments section below. Have a nice day 🙂
P.S: An Arabic version of this tutorial can be found here.


