
مرحبًا بك عزيزي القارئ، وأهلا إلى عدد جديد من حديث الأربعاء، أستعرض فيه ما يدور بفكري، ويجوب بخاطري، والقليل من هنا، وهناك. لذا هلم معي، لنطالع معًا هذا الحديث الجديد.
Category: USB (Page 1 of 2)
ربما يكون المسجل الذي في سيارتك عتيقًا. ليس به سوى فتحة لشريط كاسيت. وربما يكون أحدث من ذلك قليلًا وبه قرص مدمج (سي دي) لكن ليس به فتحة يو أس بي، أو مقبس Aux. في هذه الحالة ستجد نفسك مضطرًا للاستماع إلى التلوث السمعي الذي يسمى قنوات الراديو. وربما لا! فلدي حيلة يمكنها تطوير تجربتك السمعية في السيارة.
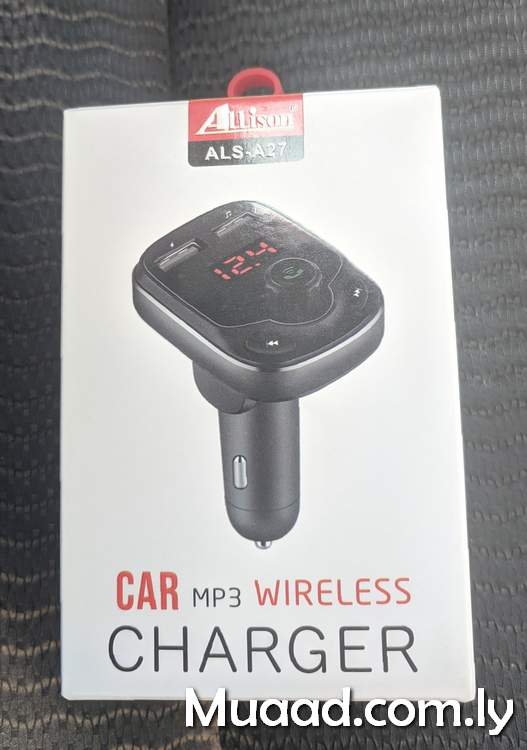
كل ما تحتاج إليه هو هاتفك الذكي، ووصلة صغيرة، وبالطبع المسجل!
كيف تحول مسجل السيارة القديم إلى حديث؟
- قم بتوصيل الوصلة في مقبس ولاعة السجائر، أو في مقبس 12 فولت إن كان متوفرًا.
- بمجرد أن يعمل قم بتوصيله مع هاتفك بواسطة البلوتوث.
- تأكد من أن المحطة بالراديو هي نفس المحطة التي تعرضها الوصلة. في هذه الحالة هي 88.8
- أيضًا تأكد أن الوصلة متصلة بجهازك وأن مخرج الصوت منها.
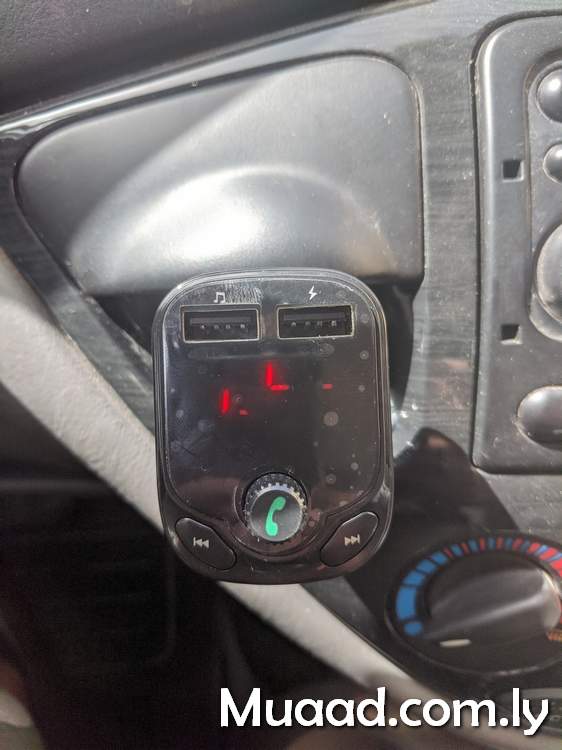
مميزات هذه الوصلة
- بهذه الطريقة يمكنك عرض الملفات الصوتية المخزنة بجهازك على مسجل السيارة.
- وأيضا تلقي المكالمات الواردة على مسجل السيارة. لكنك سترد من ميكروفون الهاتف بالطبع.
- وأخيرًا يمكنك شحن هاتفك أثناء القيادة.
في الختام
مثل هذه الوصلة الصغيرة، الرخيصة. هي تطوير حقيقي لمسجل السيارة. دون تكاليف باهظة أو الذهاب للورش أو محلات الكماليات لاستبدال المسجل بآخر حديث.
ما رأيك في هذه الحيلة؟ هل تستخدم وصلة مشابهة في سيارتك؟ ما هو النوع الذي تنصح به؟ شاركني بذلك في قسم التعليقات.
Here is a problem that is going to ruin your day. But it’s super easy to fix.
———————————————————————————————————————————–
Update February 2021
- Run CMD as administrator.
- Enter this command:
chkdsk /f x:
Where (x) is the name of your hard drive. - Let it work, and you’re good to go!
———————————————————————————————————————————–
I must note that the screenshots weren’t taken at the actual recovery job, but afterwards. And please check the disclaimer before continuing with this post.
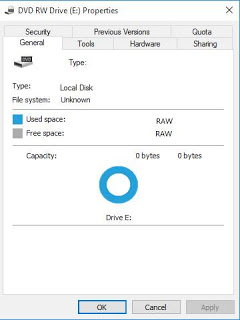
When your drive is RAW and you think all your data is gone. The reason is because the partition is damaged but all of your data is intact..

As long as the HDD isn’t clicking when connected and running normally. This fix applies to you. Disclaimer: (Attempt at your own risk) I’m not responsible of any data loss. Continue at your own risk..
I first tried with TestFisk 7.0 But after a day and a half (yes a day and a half!) and the data I recovered was jumbled and nameless (mostly there but scrambled) and totally out of place!
I attempted a fix the HDD with Gparted but it didn’t work and caused my system to freeze.
And I always recommend to have a backup of your data.
What I did was a simple format (after verifying that the data was there using TestDisk 7.0).
All you have to do is to is to format the drive (yes!!) and then preform a recovery on the drive to recover the data with the data structure intact.

Make sure you start the recovery immediately after the format to make sure no files are overwritten.
I used Recuva because it’s free, really easy to use and has a nice interface and it uses a wizard so it’s even more simpler. In case you are a first timer, I’ll post detailed steps 🙂
Download and install Recuva and start it to see this screen, and click Next.

On the next step choose other to show all files
and click Next.

On the next screen we want to recover our lost data so we choose the newly formatted HDD and click Next.

Now choose if you want to enable deep scan, this will take a long time depending on your drive size and data. Check it and click next.

Let the setup run, this may take HOURS so keep in mind to plug in your laptop or to get a UPS. And the program will be minimized.

Once it’s done, you will see the results page.

Now that the data is recovered, it’s time to save it on your computer. Don’t choose the drive you scanned as a recovery directory.


Wait for the recovery to end. if it’s a lot of files it will take a really long time!

Once the recovery is done, you are shown the results page.

Click OK and we are done!!
How easy was that?
I hope you find this useful. And that it saves your day!

Hey there you guys. How are you today? Today I’m going to be talking about backing up Android applications to your computer. It’s very simple and really handy!
This way you can create a personal backup of your application
I’m going to be using a software called Myphone Backup. Which comes in two parts: Android app. And Windows installation.
It’s a software used to manage your phone over a connection. And backup contents. I used version 1.8.3 for the tutorial while the links on the site are the latest 1.8.6
It’s freeware, if you like it then consider posting a donation to support the development!
Install the app on your phone and the software on your computer.
Now open the app on your mobile and select the way to connect. Let’s use Wifi.
After installing it. Go to the start menu and type” Myphone” to have it appear in the search results.

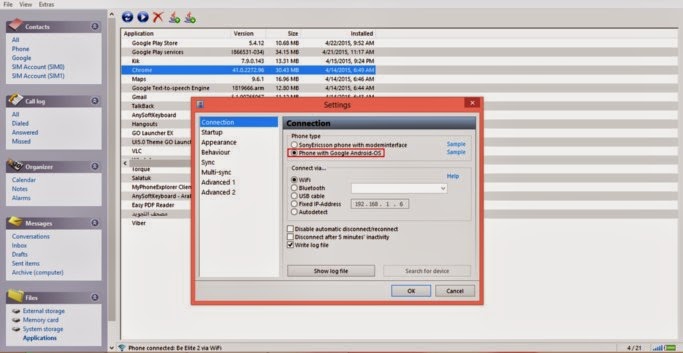
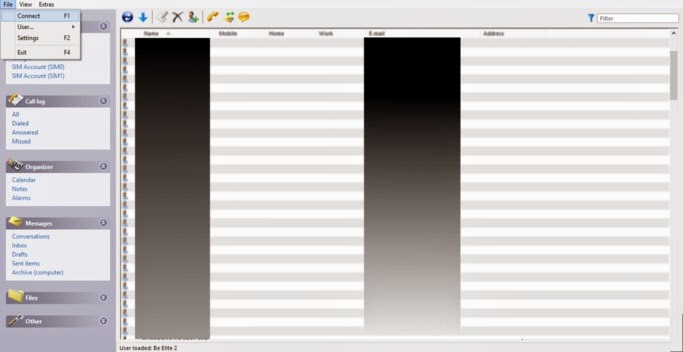
Then let’s run the computer software. And connect to the phone by going to File Connect. Or pressing F2.
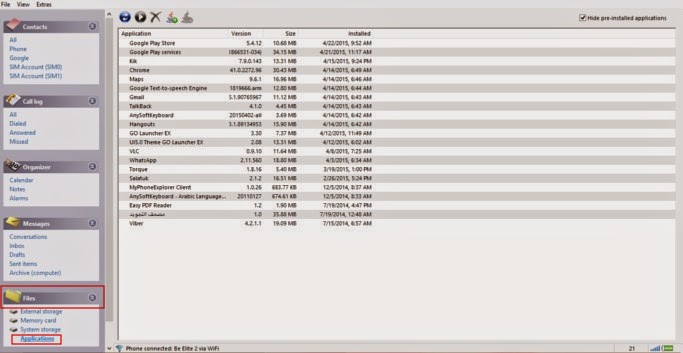
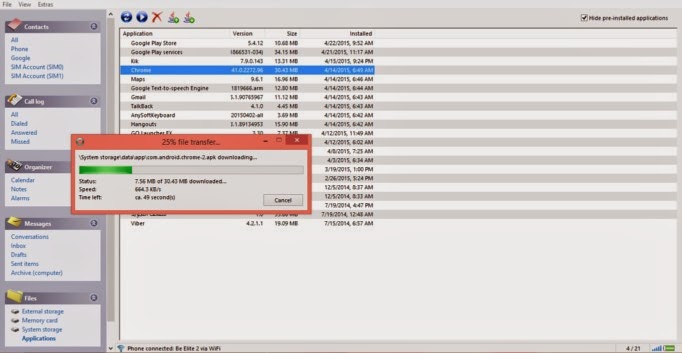
After connecting to the phone go to the pane files. Then choose apps.
Hide system apps for safety.
You can install apps via side loading by pressing upload, save them by pressing download, And many other useful functions!
From here you can backup the applications one by one. Click on the desired app and select download.
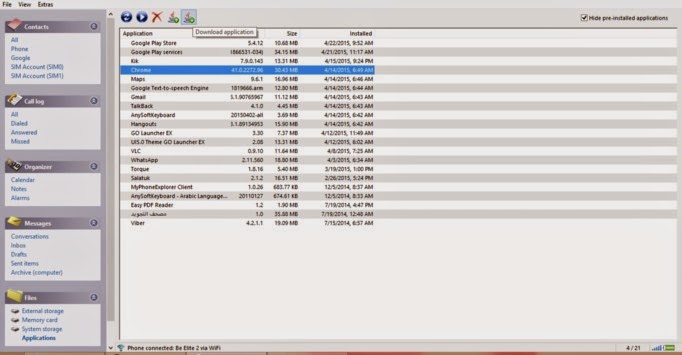
It will prompt you to select a location to save it. Wait a little, and the app is saved to your computer in .apk form
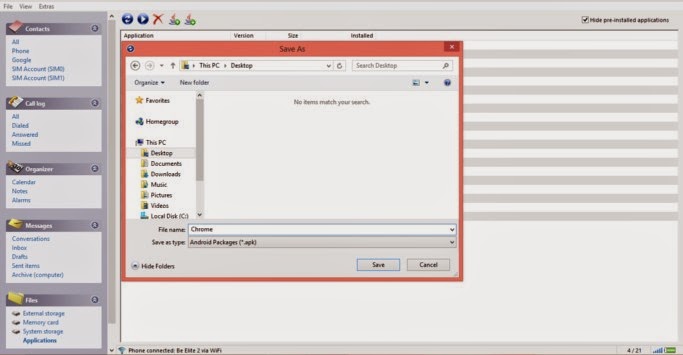
Wait for the progress to finish. And there you have it!
The most common way for this method to fail is the connection between the computer and the phone. So make sure you do it properly. And choose Android from the settings.
I hope you enjoyed this post! Please comment below and let me know what you think?
Do you have an easier way to backup apps. Let me know it 🙂
أنا الفائز بجائزة المدون المنتظم لعام 2025 من موقع مرجع التدوين
