
Many new Linux users are surprised by the fact that their batteries don’t last as long as it did. On top of adapting to a new system, this comes along to add strain to them. At ease new Linux users and older ones a like. I have a trick up my sleeve that’s guaranteed to work!!

It’s called PowerTop. And what it does is pretty simple. It allows you to disable some services while unneeded to save battery.
To download power Top go to the terminal and type in: “sudo apt-get install powertop” without the quotes of course!! And enter your password to continue.
It’s really small. About 150KB. So it shouldn’t take long to download.
How to use Powertop to save power?
After it’s downloaded. Type in: “sudo powertop” to display the program.
It runs within the terminal. It doesn’t have a graphical interface. But it’s really easy to use.
That’s the main interface right there.

We move around using the TAB key on the keyboard. Until we reach Tunables. Now here things get interesting!!

Here you see all the things you can “tune” in order to make your battery run better.
Notice that disabling some items might interfere with how your devices work (I left the mouse on because it kept “sleeping” every time I let go of it!
Click escape to exit. And there you have it!!
Note you might have to do the tuning again after you recharge the laptop.
I noticed a significant save in the battery life! Note that I use an external monitor. So that could be a factor! But in general, great tip!!
TLP
This scriptis very small and it keeps your computer under check, it controls the fanspeedCPU, all you have to do is:
sudo apt-get install tlp
Then to start it all you have to dois:
Sudo tlp start
You will see a message saying: TLP started in AC mode, meaning it’s working!
Another trick: Controlling the CPUfrequency
Installing CPU Frequency
To Install CPU Frequency type this command into the terminal and hit enter.
sudo apt-get install indicator-cpufreq
After installing CPU Frequency you need to restart in order it to work, after installing you will see the CPU Frequency’s indicator docked with the other indicators, and the using it couldn’t get any easier!
How to use CPU Frequency
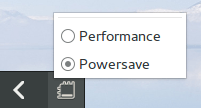
CPU Frequency starts with the system minimized and has no splash or interface, when clicking on the CPU Frequency’s icon you will see two modes, power save and performance, use the power save coupled with Powertop to achieve maximum results! And leave the Performance mode for those times when you need extra juice!
It helped me reduce the fan noise greatly and I couldn’t be happier with it!
Final words
How did your computer perform after these tricks? Hopefully charged and happy with no noise whatsoever! Until next time!
Have a nice day!!
Remember to give kudos. Comment and share this post please.