Category: Ubuntu 16.04 LTS (Page 1 of 2)

How to compile the latest version of Wesnoth on Ubuntu and integrate it with Lutris?

Wesnoth is a wonderful game available for free for Linux, however lately it has been falling out of favor with packagers; currently stuck at 1.14.5 while the latest version is 1.14.7 as of this writing! This tutorial will show you how to compile the source code of the game and integrate it with Lutris, and even add a custom icon so it can be searched easily across the system and docked on launchers.

Compiling Wesnoth from source on Ubuntu 16.04

While this method is not recommended and it’s only advised for advanced users only, it could be the only way to have the latest version of Wesnoth on Ubuntu.

1. Download the source code from the game’s site, always go for the latest version. and make sure to checksum the source code prior to doing anything, the value of the checksum is provided on the download page and you can easily check it using the terminal.


2. In the terminal, install scons using: sudo apt install scons
I’ve  decided to compile the source using scons rather than cmake because it’s much easier, however the compiling process happens in the same directory as the game, so make sure to copy the game to the target directory first, I’m going with /opt/wesnoth-1.14.7/wesnoth for the rest of the tutorial.

3. Download all the missing dependencies:
sudo apt install libsdl2-dev libsdl2-image-dev libsdl2-mixer-dev libsdl2-ttf-dev 


libboost-all-dev libvorbis-dev libcairo2-dev libpango1.0-dev l


ibssl-dev libreadline-dev cmake make scons pkgconf

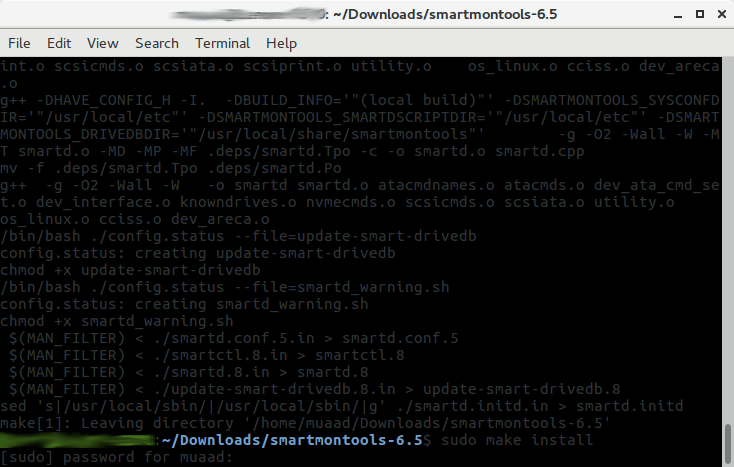
4. Go into the game directory, for example /opt/wesnoth-1.14.7/wesnoth and install with the command scon.
Please note that the process is long and resource extensive, so please be patient.

More instructions and options can be found here on the official wiki.

And that’s it, now the game works fine!

Note: If you played an earlier version of Wesnoth, please be sure to copy your save games and preferences so you don’t start from scratch.

Integrate with Lutris

After compiling from source, Wesnoth can be easily configured to work with Lutris, simply by changing the path of Wesnoth from the default to wherever you installed it, I happened to install in /opt/wesnoth-1.14.7

Lutris icon


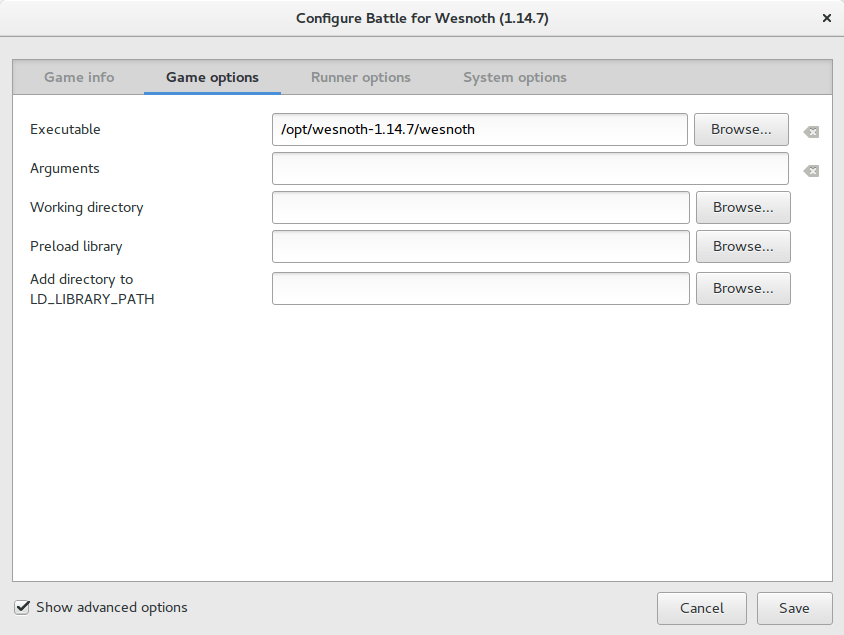
A screenshot from Lutris showing how the directory is changed


Adding an icon so you can dock it and be able to see it in the dash

Compiling Wesnoth this way won’t allow you to be able to search it or add it to plank for example, you will have to add a custom icon for this to work.
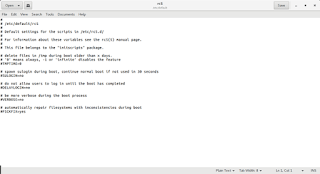
1. Go to /usr/share/applications/ as root and create a new .desktop file using a text editor (with sudo privilege).
The contents of the file should be like so:
[Desktop Entry]
Name=wesnoth
wesnothComment=The Battle for Wesnoth
The Battle for WesnothEncoding=UTF-8
Exec=/opt/wesnoth-1.14.7/wesnoth
Icon=/usr/share/applications/wesnoth.png
Terminal=false
Type=Application
StartupNotify=false
Categories=Application;Game;

Feel free to copy this file to your computer as long as you have everything installed as mentioned here, if you change anything make sure this document reflect your changes.

2. Save the file and you are good to go! As soon as you loook up Wesnoth in your system you will be able to find it and dock it on launchers such as plank.

After doing all that, I’ve uninstalled the old 1.14.5 and removed the repositories from my system, from now on I’ll compile on my own!

I hope that you find this tutorial useful, if you have any questions please let me know in the comments section below.

Credit goes out to Reddit user TonicAndDjinn as he provided a lot of helpful tips on how to compile the game.

How to download Bucklespring as a Deb in Ubuntu and enable it?

Bucklespring keyboards are iconic keyboards with distinct sound effects, sadly they went out of fashion however you can still relive the wonder of them on any keyboard you have

Downloading as a snap vs .deb

The most popular way to download this trick is via a snap, but I don’t like to use these nor have any of them installed. I still prefer the old fashioned .deb packages. 


A bucklespring keyboard

The packages

The package bucklespring_1.4.0-2_.deb can be downloaded easily from Debian’s packaging website (I shall link it below), please note that you won’t find this deb package in Synaptic.

Download the bucklespring-data_1.4.0-2_all.deb and the bucklespring_1.4.0-2_.deb.Install the data first then the bucklesrping package itself.

How to run Bucklespring?

Bucklespring has no GUI (Graphic user interface), so in order to get it to run you need to open the terminal and simply type in: 

buckle

Download links

Please choose the right architecture for your processor.

Important notes

You have to keep that terminal (x session) open in order to enjoy the bucklespring sounds as you type on the keyboard.

I happened to notice that some keys don’t produce the sound as they are typed on (the number pad on the right side of the keyboard).

Final words

It’s a cool trick to have enabled, totally changes your using experience of the keyboard. I find that it’s best paired with LED enabling (also enabled from the terminal) for a maximum nerdy effect.

Have you enjoyed this tip? Do you like the bucklespring noise? Tell me what you think in the comments section below, and I’ll catch you in another one!

How to fix and prevent the /dev/sda1: recovering journal On Ubuntu 16.04 Gnome

As I was booting my computer up one morning I saw this awful error message rather than the Ubuntu Gnome boot logo, it turned out to be a common error and can be fixed easily, let’s get to the details!

/dev/sda1: recovering journal

Cause of the issue

The problem occurs when the computer isn’t shut off properly or when electrical failure happens, some data on the SSD

isn’t stored properly and the boot process is halted.

In my case it’s the power issues that ruined my laptop battery and is making it’s way to my data stored on the SSD. 

How to fix it

The screen itself suggests a terminal command to fix the drive which was useless in my case, my easy fix was using a live Linux installation from a USB -I used Linux mint- and used Gparted to fix the damaged drive (please note that using Gparted can be very risky and cause data loss). 

Using Gparted from a live distro

We are using Gparted to fix the partition, it depends on how you did your disk but it’s the same way.
Entering the password to run Gparted.
Opening Gparted


  Viewing a list of disks on your computer.

View disks with Gparted


 Checking the drive for errors with the right click menu.

Checking the disk for errors using Gparted

We now click Apply changes.

Applying changes using Gparted
After applying changes we can safely reboot, the fix is done!

Making sure damage didn’t happen

ِAfter rebooting the computer will open as usual, but we want to make sure that the drive wasn’t damaged, to do that we will install a small command line tool called Smartmontools 6.5 and it can be downloaded from this link.

Installing Smartmintools-6.5

Samrtmontools is a terminal utility
to check and monitor disk performance. 

To install Smartmontools we need to un-compress the tarball and we do this from the terminal

  tar zxvf smartmontools-6.5.tar.gz

The previous step created a directory called smartmontools-6.5 containing the code. Then we go to that directory, build, and install:

 cd smartmontools-6.5

  ./configure
  make
  sudo make install

After running these steps we managed to install Smartmintools-6.5 tarball from the terminal.

Running Smartmintools-6.5

Run the command:  sudo smartctl -a /dev/sda. And if the results are like the the screenshot your drive is safe, as it says clearly: No errors logged.


How to make the fix automatic on every boot

Instead of performing the fix every time the issue happens, it’s easier to set the config autofsck to run at every boot. 


Edit the file etc/default/rcS and change the FSCKFIX from no to yes by using this terminal command:


gksu gedit /etc/default/rcS
Here it opens a gedit windows, navigate to the last line.

Editing /etc/default/rcS

Change the FSCKFIX from no to Yes and save to finish.

Editing /etc/default/rcS

This way every time the issue occurs the system will automatically fix it and continue booting normally. 

This is how to fix and prevent the /dev/sda1: recovering journal on Linux Ubuntu Gnome 16.04 and similar distros, it’s really easy to fix but it can be scary and ruin a day for you if you don’t know what to do.
And I highly advise you to backup whenever possible

Ubuntu 16.04 is finally out!

Finally! The much anticipated Ubuntu 16.04 is out! I’ve been waiting for months for this new release! Thank god it’s finally out!

The wait is FINALLY over!!

So what makes this release very special?

  New features in Ubuntu 16.04


  • Introduces “snaps” for new robust, secure app format
  • Introduces LXD pure-container hypervisor with OpenStack Mitaka
  • Supports IBM Z and LinuxONE systems with flat pricing
  • Steps towards converged Ubuntu across IOT, Phone, Desktop and Server
  • Introduces ZFS and CephFS for large-scale cloud storage .
  • New Linux Kernel 4.4

New installation media!

For the first time, Ubuntu will be shipped on USB Installation Disk rather than the usual CD/DVD that has been used since the beginning, and will cost around 6.5$ per disk (shipping not included), credit for this goes to omgubuntu.
If you cant buy it or won’t, here is my tutorial on making your own Ubuntu USB disk, but I’d love to have one of those to be honest!!


Ubuntu 16.04 installation disk

Other flavors of Ubuntu are out today as well! So feel free to check your flavor’s website! Most get 3 years updates unless you crave Kubuntu!
Now we come to my personal favorite part, downloading Ubuntu!

Download

To download the ISO image click here, 1.5 GB.
There is also a torrent link for Ubuntu, which is better for the servers (not sure how!)
I’m personally downloading Ubuntu Gnome, so here is a link for that.
Sadly it comes with 3 years support only, but I’m sure it will be enough!
After you download the image, you are going to need to burn it on a DVD or use the much faster USB method, see my tutorial on putting Linux on a flash (Don’t worry if 16.04 isn’t listed in YUMI’s list, it will work!).


« Older posts