This post is using version 5
Before beginning you need to go to your BIOS and enable the “Enable Visualization option” so your computer can handle them better!
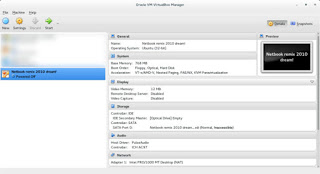
Installing VirtualBox is pretty straight forward, and as soon as you finish you will have the main interface of the program, it uses wizards and it’s very easy to use.
As soon as it runs it will ask you to determine an Operating system to run, define the name and system type, the hardware specifications, size and type and location of the virtual machine and the machine is created!
You need to have licenses for the systems you are installing. Installing Windows in a virtual environment doesn’t mean it you can use a pirated version of it!
It’s recommended never to surpass the actual hardware capacity of your system, and it’s best to leave the specifications as recommended.
Also don’t overload your system, if you crash the OS system then all of the machines will crash too.

Once you set the virtual machine you need to install the actual system inside of it, it’s totally safe and it won’t harm your host system. You need to own license to the systems you need to install, but if you are installing Linux you are free to install it without legal restrictions as the GPL license allows you to.
Installation varies depending on the system and you can find many installations detailed here in this blog, having a virtual machine is a good place to learn how to install new systems safely.

Once the system install is finished, you are ready to use your guest system.
You can’t access your host drives from a guest, for that you need to download the Extension pack to be able to access folders on your system.
Go to VirtualBox.org and download the extension pack suitable for the version you downloaded,I linked the extension pack suitable for version 5.
After installing it you are able to add the folders you wish to share from host to guest as network folders, or you can use a cloud or a USB to transfer data!
To make sure that the USB works you need to add your user to the VMBOX user group, and the eaiset way to do so is by opening a terminal windows in Ubuntu and writing this command:
sudo usermod -a -G vboxusers $USER
Did you like this post and find it useful? Share it with your friends too! Sharing is caring!


Leave a Reply