Category: Productivity (Page 7 of 13)

Turn LibreOffice into the best book writing software out there

Recently I’ve came across some “book writing software” that is supposedly able to help me write a book and enhance my productivity, I gave that software a try and felt it was too complicated, If I need to take an advanced course just to learn how to use the software, that’s a serious problem and some major down time spent learning a new software while I have a productivity suit that does everything required with ease!

Ease of use

Ease of use should be factored in whenever evaluating a new software, and that particular software bombed! Not even mentioning the name because it’s not worth it, and the price tag is also discouraging!

I’m giving today a good way to use LibreOffice as a writing software that you can use for anything and really count on!

Why LibreOffice?

LibreOffice is a jack of all trades and can be used for many uses you never thought a word processing suit could do, checkout this very popular post of mine to see how capable LibreOffice is!

  • Let’s Face it, we

already have too much tools!

Type Writer

We use something to write code (Sublime or Notepad++), something to do the daily work (LibreOffice or Microsoft Office) and a “book writing software”?

  • Way to go being minimalist! Lets look at the price tag, shall we?

We bought Sublime for 70$, Got office for 200$ and that “book writing software” for 40$ and you use a Mac book of course, very neat! That’s 310$ worth of writing software alone!

That’s a lot of money, I’m not here to tell you how to live your life, but I think I have a more cost effective way of making this happen!


A minimalist dream!

You can’t write everything in one place, I wish that was possible, like Atom handling complex text layout or using LibreOffice to write code! It would be a dream come true! Some die hard programmers who think that memory foot print is everything and mostly prefer CLI over GUI would think this is a total waste, but I like to think I fall somewhere between a CLI nerd and an Apple fan!

Why LibreOffice? Because it’s simply awesome! I could write forever on how awesome LibreOffice is! You can find many posts in this blog that tell you exactly why it’s awesome and should be chosen over commercial and free software, you don’t have to learn new things, it’s the productivity suit you know and use daily! Just add the tips I’m about to tell you, and you are good to go!

1. Distraction free

Focus!An important tool for any writing software is to be able to eliminate all outside distractions and just focus on the piece of writing at hand, it’s a feature of LibreOffice that can be accessed from View Fullscreen, or by typing the shortcut Control + Shift + J. You will have the screen dimmed down to the horizontal ruler and the page only! (you can toggle the ruler by pressing Control + Shift + R) to have the document focused with nothing else on the screen.


2. Word count

Another important tool for writers is the word count, you need to know how much you have written and set daily goals for yourself, you can see that in the lower bar of LibreOffice and it’s updated as you write.

3. Writer’s Tools

Writer tools is a set of tools installed as a single extension for LibreOffice that adds a ton of functionality, so much it deserves a post on it’s own, once you install it, it adds an extra menu to the menu bar called Writer’s Tools, it adds a timer for how much time you spent on a document, a word count to see if you reached your goal (more advanced than the one at the bottom bar), a to do list, a data base to organize your text snippets. And many tools for backup, saving documents and many others. A total of 15!
It’s something you definitely need if you want to use LibreOffice as your main writing suit.

There is a fix for writer tools not working. You can find it here.

4. MultiDeff

This little extension gives you the ability to save in three different formats in one command, ODT, DOC and PDF.

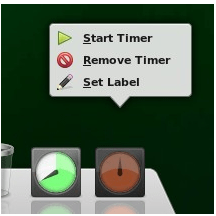
With these tools you are good to go, my advice is yo implement a timer like  Instant boss if you are on Windows or Pomodro if you are on Ubuntu, to keep you healthy while writing the next best seller.


5. Master Document

I left the best for the last! Master pages are a great way to collect your individual documents into one, enabling you to control the style and position of each sub document based on the master document, creating a consistent document all around!

For more information check the detailed help document from here.
To create a master document, go to File New Master Document
How to create a master document
For complete help on working with master documents, check the

Libreoffice help section from here.

If you aren’t using the excellent native feature, then creating a book will be a problem for you! When you have a standard container for all of your chapters, you can control the style easily and be able to get a central view on all of your work!


Final words

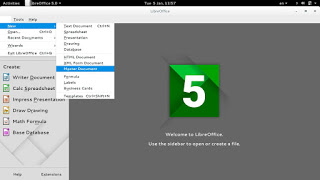
If you aren’t a LibreOffice user already, go download it now! You can install it without changing your settings!

I hope you find this post useful! And I’d like to know what do you use for word flow!

If you are using LibreOffice then you don’t need much more!!
Do you have any other features to add? I’m waiting for your comments!
You like the post you just read? Then share it with your friends! Sharing is caring!

Zim-Wiki: Where have you been all my life?

I’ve come across Zim-Wiki while searching for the best note pad application , in this review I shall talk about why it has become my go to application for almost everything!

A true al l in one solution!

Before installing Zim-w iki I used several software to do a part of the functionality it has!
Zim-Wiki logo
Zim-Wiki logo

I used Rednote book as a daily journal and Tasque to make to do lists while using basket notes as a personal knowledge database! Talk about a cluttered data life!

Now after migrating to Zim- wiki I replaced all o f that software for more versatility, more functionality and more focus!  Which in turn made me a lot more productive! Less resources an d more work done!

Zim -wiki is light weight and cross platform (Windows and Linux). It operates like a wiki so it makes it easy to store and retrieve data and link pages together.

It’s simple and easy to use. And the interface is pretty straight forward. And gets the job done.

  • I also look into the import / export feature as I need to backup and restore data quite often, and without it , it would be useless like Tomboy (now Gnotes).
  • It is amazing! Just look at t h e plugins like the  box backup. It seems perfect so far.
  • It has a journal feature, it can log events against days on the calendar, if you like to keep your program count down, it’s a good idea to use the embedded journal and abandon other applications. You can access the journal feature by clicking the calendar icon on the right.
Zim-Wiki interface
Zim-Wiki interface

Plugins

Zim Desktop wiki is expendable with the use of plugins, you can download and install many plugins from this site,  and access them from the menu :
 

Edit Preferences Plugins

It also supports word count and many other editor features to make the experience complete like the distraction free mode, just hit F11 and enjoy! It can be used to write a book as well, you can make your book the main folder and then distribute it on the pages and link it all together easily!

I did mention that LibreOffice is the best book writing software out there, looking closer at Zim-wiki, LibreOffice won by a nose!


Tags

You can use the tag feature by typing @ before any word, that will be a tag, and it will be displayed in the tag pane , it’s used to c ollect and sort da ta and make finding things easier inside notebooks.


Restoring after delete

If you delete a page by mistake you can easily recover it from the recycle bin (or trash, depending on your system).

Check the help embedded for more cool tips on how to use Zim desktop wiki.

Download and install


You can download Zim wiki by visiting the website and downloading a .deb archive to install, or you can add the repository so it grabs updates automatically as a part of the system update.

sudo apt-get add-repository ppa:jaap.karssenberg/

zim
sudo apt-get update 

sudo apt-get install zim

Z i m -wiki as a to do list app

I used to use Tasque to handle my daily tasks but not anymore! Now I enable d the Task list plugin and I was set! It’s that good! Enable the plugin by going to:  


E dit Preferences   Plugings Task list


After that you will see the checkbox icon, add the word todo to any line to make it a task, strike it through to mark it done!

If you want to see a checkbox then go to Insert Checkbox list.


Zim-wiki task list plugin

Zim-wiki as GTD software

Although Zim-Wiki wasn’t developed to be a GTD (Getting Things Done) application, it can be edited easily to support the productivity plan, you can find this tut orial on Zi m -wiki’s site that tells you ho w to make it.


Markdown e d itor

If you like to use Markdown to style your documents and work then you don’t need to look for other tools! Zim-Wiki has you covered with Markdown support!

< ” Rati ng

Zim -wiki is awarded 4.95 on the Ubuntu software center receiving tons of positive feedback, so it has to be good! It’s also well received on Alternativeto.net

Honorable mentions

In this bit I’ll mention some other apps and why I stopped using each of them.
  • I started with Treepadlite and I didn’t like the interface.
  • I also tried CodeLib which was really good except the random crashes and the heavy memory foot print.
  • After that I used Tomboy which I really loved excepts the fact it doesn’t export notes which made me lose lots of notes. Also it’s tricky to figure which GTK library to use with on Window s.
  • I then adopted BasketNotes. Which was really really good. Except for one thing. It is a K D E application and for that I needed lots of libraries that Xubuntu didn’t have, and that made it heavy and prone to crashing.

So I decided to export the notes and find a suitable software for my needs. Here comes Zim-wiki!


What note keeping software so you use? What feature do you prefer the most?
Sharing is caring, share this post with your friends.

The first thing you should do each morning!

Having a plan is essential for daily success. Planning your day carefully can make you a lot more productive..

Make a to do list first thing you wake up in the morning, or better yet before you sleep! And make it happen!

Check the task list first thing in the morning rather than your timeline! I mean it!

 Here are some to-do list guide lines

  • The first two items have to be super easy, to build confidence and gain the sense of achievement.
  • Don’t plan too big, then it becomes hard to achieve the item, and you wouldn’t know to mark done or not.
  • Divide the big tasks into smaller tasks so its easier to mark done.
  • If it was achieved partly. Have an icon for that and migrate it to tomorrow.

Timing is everything, you can’t have one task taking up all of your day! Set a timer! I suggest Instant Boss for Windows users, and Pomodro for Linux users.

Using software and apps make it much easier,

I reviewed several ones and you can pick whatever you like! But I find writing it on paper much more satisfying! If I have to recommend one it would be Zim-Wiki.

What are your secret productivity tips? Share them here with us!
Sharing is caring, share this with your friends!

An Arabic version can be read here.

How to make the awesome Docky bar even more awesome with these tricks?

Today I’ll be talking about making the awesome Docky dock even more awesome!

As you know Docks are really productive and once you get used to them you are hooked for good!  I mentioned it in an earlier post as an honorable mention, but I always felt Docky deserved a post of it’s own!

First of all let’s take a look into how many versions of Docky are available and what to choose from?

Docky has two active branches : Stable and Development, each one has it’s pros and cons. I will be talking about them in detail and why I choose one over the other!

Stable branch

It’s the official Docky branch currently at version 2.2.0.2
You can add it to your system by adding the PPA to your software sources. If you aren’t sure how to add the PPA then check this post I made some time ago that shows how to add a PPA.

  • It has many options compared to the development branch with the ability of adding more than one dock!
  • It also has docklets and helpers which are excellent for productivity.
  • It has some bugs tho like crashing on standby and not docking the file manager (easy to fix).
  • I tested out both and came up with a resolution!
  • I choose the stable branch simply because it gives you more options to work with, not to forget the docklets that add great productivity value, like adding a work timer!


I didn’t find a similar work timer to the awesome Instant boss, this is really close! Checkout how to set this awesome clock from it’s help page! It can also work as an RSI timer! All from within your Dock!!
You can set more than one timers and set labels each, For example one for work and one for rest and have them work together on the Dock!!

I overcame the stable branch not pinning my file manager Thunar simply by dragging the home folder and dropping it on Docky! Now whenever I click it I get my home folder in a blink of an eye.
Another bug is when you install Docky for the first time it asks for composite to run properly. And you will notice that the dock seems off!
Go to Settings Windows Manager Tweaks And on the Compositor tab enable composition, it will work like a charm!

Enable composition for docky to work properly

A strange bug

Finally there is one weird bug that happened with me on 14.04 LTS Trusty, whenever I put the computer to sleep and wake it again, Docky isn’t there!
I used to put an icon for it on the desktop to “wake it up” but that’s just too counterproductive isn’t it?
The answer is really simple and I can’t wait to share it with you! All you have to do is to add a script to your sleep folder and execute it using terminal.
The steps are displayed in here, because I’m using Xubuntu I had to change gedit to mousepad. But the rest applies and works 100%

*Update 1: It didn’t go as planned and I had to undo it.
**Update 2: Not all updates can be installed: partial upgrade.

Once this message appeared Docky 3.0 was removed and I wasn’t able to install it again. Docky 2.2 closes itself without warning. I still haven’t figured that out yet!

***Update 3:  I managed to make docky 3.0 work again I used the debs downloaded from the repositery and installed them using gdeb. The secret is the order of install. Libplanlkcommon at first, then libplank, and finally docky. Read about it here.

There you have it! We made the awesome Docky even more awesome! And you thought that wasn’t possible!
I chose Docky 3.0 over 2.0.2 because it’s more stable and doesn’t crash randomly all the time.
Anyway I hope you enjoyed this! And I’ll see you in a coming post!

« Older posts Newer posts »