Category: How to (Page 14 of 20)

Installing Windows 10 insider on Lumia 630 Dual

I decided since the Windows 10 update was rolling in “waves” that I want to try Windows 10 early on my Nokia Lumia. I installed Windows Insider on the phone and choose the fast ring.

As soon I did so there was a Lumia Cyan update installed. And after the usual steps I began to install the insider build 166 (was out on July 13th 2015)

I left it installing because the download took a long time, after it finally downloaded and installed many things stopped working! I was given some error codes but doing some research did me nothing! (CV: irVVS0fyS0ifo9wW
0x80072f05)


    Office was gone!

    OneNote stopped working!

    All the updates that were pending stopped working as well.

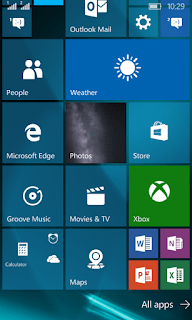
    There were some nice improvements. I can’t deny! The already great typing experience has become even easier with the added cursor and several UI improvements that made it consistent with the desktop version.

    I had to install the 512 build that came out on the 12th/08/2015.

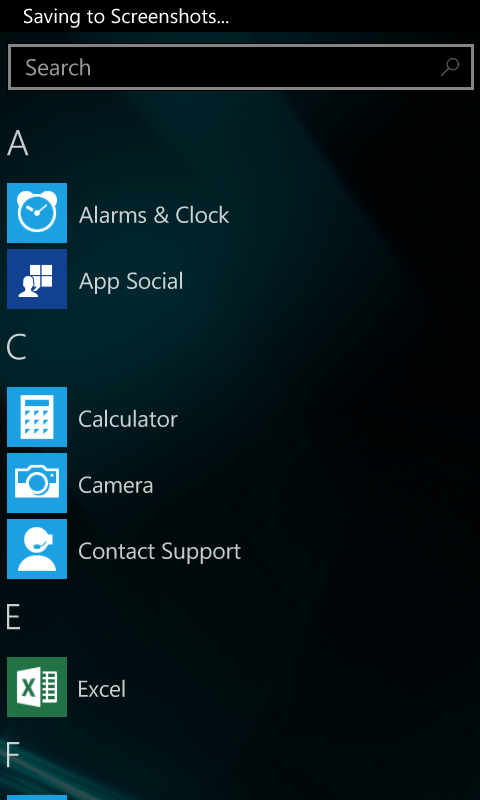
    After a while the 512 build finished installing. It looks good so far. Office is broken down to three apps: Word preview, Excel preview and Powerpoint preview. (Which needed to be purchased then installed from the store).
    The store worked fine after the upgrade, and the errors aren’t displayed anymore!

    The phone became slower and hotter. So a reset was due. It worked better. But the office applications requires an office 365 license to work. And Onenote became so hard to manage! (I needed to scroll so much to get to anything).
    The phone lags a little bit and Cortana became less responsive. So I decided to rollback to 8.1
    As confirmed by Microsoft upgrade adviser, Windows 10 won’t be available for Lumia 630 / 630 Dual. So this is the only way to get Windows 10 on your Lumia phone.

    مقدمة الى التصميم

    توجد عدة طرق خاطئة لتصميم المواقع والجرافيكس. ستضمن لك الإحباط وضياع الجهد والوقت !

    لا تخطط

    نصب آخر نسخة من الفوتوشوب، وقم بفتحها مباشرة ودون تأخير!

    لاتحترم التراخيص

    تأكد من تحميل أخر كراك وقم بتفعيل البرنامج مباشرة، ولا تهتم لسرقة بياناتك الشخصية أو تدمير حاسوبك!

    لا تتعلم

    لا تحضر دورة تدريبية أو تطلع على اليوتيوب أو كتاب جيد، فقط اغطس في البرنامج مباشرة!

    استسلم للإحباط

    اقفل الفوتوشوب والغ تنصيبه، وانزع مصمم من الوظيفة في صفحتك على موقع التواصل الاجتماعي ذاك (الذي كان مفتوحا طيلة الوقت!!)

    هل جربت هذه الطرق من قبل؟ جيد! انت مستعد لدراسة التصميم!

    في البداية لنفهم جيدا معنى كلمة تصميم، التصميم هو تصور متكامل للعمل الذي نريد القيام به، يشمل كل التفاصيل، أدق التفاصيل دون ترك شئ للصدفة، فلنأخذ مثالا شهيرا:

    • عندما يقوم المهندس المعماري ببناء بيت فإن أول شي يقوم به هو رسم الخريطة، هذه الخريطة هي رسم تفصيلي لكل أركان وزوايا البيت، أي إنها تصميم!
    • لا يستطيع المهندس بناء بيت عشوائيا دون مراعاة المساحة وحدود الأرض وكميات المواد الخام وعدد الغرف والميزانية، إلخ..

    الأمر ذاته ينطبق على التصميم بالحاسوب!

    لذا إن أردت تصميما جيدا فعليك ترك “الفوتوشوب” لوقت لاحق!

    في البداية وقبل كل شئ يجب أن نقوم بمعرفة التصميم، ثم نضع الخطوط العريضة للتصميم، ثم ندخل في التفاصيل.

    هذه الأمور تحددها متطلبات التصميم، سواء كان لك أم لزبون فيجب التقيد بالموضوع (Theme).

    في النهاية بعد أن نتحصل على فكرة متكاملة من حيث الشكل واللون ونوع وحجم الخطوط، نبدأ في العمل على الحاسوب.


    CCleaner for Ubuntu?

    Until the time of this writing Piriform hasn’t made it’s software available for Ubuntu. But there are other tools you can use to clean and optimize your computer.


    One of these tools is Ubuntu Tweak. A suit of tools that is used to tweak and optimize Ubuntu and control some aspects that aren’t usually easily available.

    About Ubuntu Tweak

    To install Ubuntu Tweak click this link and download it to your computer then install it as you would do normally.

    From the main menu navigate to janitor and click the stuff that need cleaning.

    Ubuntu tweak Janitor

    There are several categorizes: Apps, Personal and system.

    You have to be careful when cleaning. If you don’t know what to do I suggest you avoid the system category.

    Once checked press clean and enter your password to clean up the system as you see in the image!

    It’s a good way of tracking disk space and keeping an eye on your system.

    Please note that cleaning up the APT cache will delete the software installations you downloaded from the software center, and you should copy them first for backup and re installation if anything happens!

    Fix Raw USB or HDD on Toshiba HDD and other brands easily using Recuva

    Here is a problem that is going to ruin your day. But it’s super easy to fix.
    ———————————————————————————————————————————–

    Update February 2021

    • Run CMD as administrator.
    • Enter this command:
      chkdsk /f x:
      Where (x) is the name of your hard drive.
    • Let it work, and you’re good to go!
    ———————————————————————————————————————————–

    I must note that the screenshots weren’t taken at the actual recovery job, but afterwards. And please check the disclaimer before continuing with this post.

    When your drive is RAW and you think all your data is gone. The reason is because the partition is damaged but all of your data is intact..

    HDD is RAW


    As long as the HDD isn’t clicking when connected and running normally. This fix applies to you. Disclaimer: (Attempt at your own risk) I’m not responsible of any data loss. Continue at your own risk..

    I first tried with TestFisk 7.0 But after a day and a half (yes a day and a half!) and the data I recovered was jumbled and nameless (mostly there but scrambled) and totally out of place!

    I attempted a fix the HDD with Gparted but it didn’t work and caused my system to freeze.

    And I always recommend to have a backup of your data.

    What I did was a simple format (after verifying that the data was there using TestDisk 7.0).

    All you have to do is to is to format the drive (yes!!) and then preform a recovery on the drive to recover the data with the data structure intact.

    Simple format dialog

    Make sure you start the recovery immediately after the format to make sure no files are overwritten.

    I used Recuva because it’s free, really easy to use and has a nice interface and it uses a wizard so it’s even more simpler. In case you are a first timer, I’ll post detailed steps 🙂

    Download and install Recuva and start it to see this screen, and click Next.

    Recuva startup wizard


    On the next step choose other to show all files

    and click Next.

    Choose data type. Other

    On the next screen we want to recover our lost data so we choose the newly formatted HDD and click Next.

    Lost data location

    Now choose if you want to enable deep scan, this will take a long time depending on your drive size and data. Check it and click next.

    Enable deep scan

    Let the setup run, this may take HOURS so keep in mind to plug in your laptop or to get a UPS. And the program will be minimized.

    Scanning for data

    Once it’s done, you will see the results page.

    Scan results

    Now that the data is recovered, it’s time to save it on your computer. Don’t choose the drive you scanned as a recovery directory.

    Browse for a recovery directory


    Reduces the chance of file recovery

    Wait for the recovery to end. if it’s a lot of files it will take a really long time!

    Recovering the files

    Once the recovery is done, you are shown the results page.

    The results page

    Click OK and we are done!!

    How easy was that?

    I hope you find this useful. And that it saves your day!

    « Older posts Newer posts »